Monday, April 30, 2012

Curly Woven Updo

I'm getting ahead of myself with this style here since I have a few steps without previous posts to show how, but many of you will know how to do them anyway.
To begin, you need some curls at the top of the head.  I used Curlformers (more on these in the future), but you can use rag curls or a curling iron to achieve the same effect.  I left them in overnight, and just used six.
Get the curls out of the way, and pull the back hair into a ponytail.
Now do a four-strand flat plait (cross the sides, then cross the middle in the other direction).
After crossing the middle strands, combine each two side pieces together so you have only two strands instead of four.  Pull these strands up and around the sides of the pony (one on either side) and bring them together at the top.
Add a clear elastic to hold them together.
Now tuck the tail down to one side and hid it under.  I sprayed on some water to help it bend better.  Stick in a bobby pin.
Spread out some of the plaits from the braid to widen the bun and make it look even by pinching at the edges, pull out gently to the sides, and then pinning in place.
Let out the curls.
Brush the curls back into a piggy above the bun.  Spray with water to soften some of the bumps from curling if you need to.
Lift the piggy, and then pull out a couple thin strands of curls.
Lower the piggy again.  Press down with your finger a couple inches down from the elastic, and then draw the end up again to form a U shape.  Insert a flexi-clip to hold it in place.
Arrange the curls by splitting or combining if necessary.  I pinched a small section or two hair and pulled it to add some more definition and variety of curl lengths.
I suggest using some finishing spray to help keep it nice and neat and to help make the curls last longer.

Lilla Rose is having a Mother's Day sale this week, FYI.  They have a new clip for moms and free shipping. I got this fairy flexi-clip from them, and I love it! (They aren't paying me to say that, by the way.)

Saturday, April 21, 2012

Barbie Ponytail

See the pictures in my post titled Barbie Gallery numbers 15 Fashion Fairytale, 17 Stacey, and 18 Merliah Summers in Barbie in a Mermaid Tale.  All of these Barbie pictures have incredibly thick ponytails. To get this fullness in a ponytail, I have a little trick: use a thread spool.

Begin gathering the hair into a ponytail.  For number 15, make it a very high ponytail at the top of the head.  Put an empty spool at the bottom of the ponytail and let the hair slide around it to conceal it.
Add a hairband around the ponytail.
I added a couple more hairbands of the same color now to make it look thicker.  You can add a scrunchy or ribbon if you want.  To continue with the Stacey curl, I used a curling iron to curl the tail.  I curled all the same sections in the same direction like so:
...and then brushed them together to form one big spiral.  A wider barreled curling iron would make a wider curl more like the picture of Stacey, if you have one.  This style ought to be sprayed with hairspray to keep it curled up together, and also to help prevent the hair from getting tired and falling to the side of the spool.  Using a no-slip hairband could also help with that. If you want the extra step, you could paint the spool to match the hair to help camouflage it better if it starts to show through during the day.
I've seen a tool called a Perfect Pony from Conair that has a little plastic contraption to do the same job as this spool of thread.  Perhaps it does a better job of staying concealed, but I've never tried it.

Monday, April 16, 2012

My Generic Topsy Tail Tools Broke! :o(

Looks like I will be in the market for these hairstyling tools again.  As I said in my original Topsy Tail post, I got my generic tools from eBay.  They have lasted me only about a year and a half.  Perhaps it is worth my money to go with the name brand.  What kind of reviews do you all have on them?  Do they last?  I guess I am kinda rough on them, and as you can see if you have been following my blog for a while, I use them a lot!

What I have gleaned from an item for sale on eBay is that scunci has merged with Conair, and now the Topsy Tail is made by Conair.  Neither website lists Topsy Tail, though.  Even scunci's website www.topsytail.com does not list them.  I haven't seen them in stores, either.

Tuesday, April 10, 2012

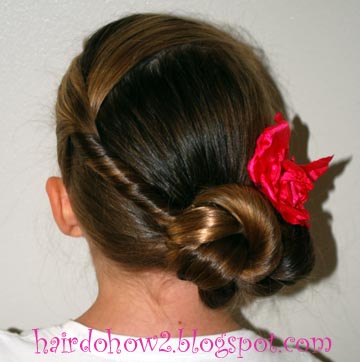
Lesson 101: Side Twist into Twisted Side Bun

(This is the hairstyle in the April Fool's Day post.)  To begin, make a diagonal part from the front side of the head back to the opposite side behind the ear.  Push the front section of hair out of the way while you draw the back section into a side ponytail.
Brush the front section of hair together and twist it.  Add the twist into the ponytail with another hairband.
Make a bun: Do a hawser twist with the hair from the original ponytail, fastening off with a clear elastic.  (Leave out the shorter hair from the twist at this point.)
Wrap the twist around the hairband, tucking in the ends to hide, and securing it all with bobby pins.
Now do a hawser twist with the remaining hair that was added in from the twist.  Wrap it around, concealing any hairbands or fray from the first twist.  Tuck in the ends, and then put in bobby pins.
We added our rose from Gimme Clips to the side to decorate.  Then Belle reminded me of a Spanish flamenco dancer.

Friday, April 6, 2012

April Fool's (a bit late)

I've been saving this picture to post on April 1st for a long time, but now I've missed it!  Oh well.  This is a twisty braid with a side bun.  Just add static from a plastic twisty playground slide!