Thursday, August 25, 2011

Lesson 70: Princess Braids

I found this picture from a long time ago and can't believe I haven't posted it yet.  It is super simple--a good idea for a quick school day hairstyle.
For the style, divide the top hair into two sections, either parting in the middle or on the side.  Braid each and secure temporarily.  Join them together with an elastic, then let out the ends.  Add a bow or flower.  Super easy.

Monday, August 22, 2011

Lesson 69: Crazy Eights Bun

This beautiful blonde is my niece.  Her pseudonym is Ladybug.  My sister-in-law (Aunt C.) did this style and took these pictures.  Ladybug's hair is a lot shorter and thicker than Belle's.  (This style wouldn't work in Belle's hair.)

Gather the hair into a ponytail.
Separate a section of hair and twist it tight out to the end.
Turn the section down, and bring the end toward the hairband. The twist will make a loop and cross over itself to make somewhat of an 8 shape. 

Pin it down with bobby pins.  Remember crossing pins in an X shape helps them stay in place better.
 Repeat.
 Repeat until you have used up all the hair.
Add a bow or flower to the side.  This flower is from Gimme Clips.  (Thanks Gimme Clips!)

Monday, August 15, 2011

Lesson 68: Barbie Mermaid Merliah Hairstyle

Belle loves Barbie.  She likes to play with the dolls, but really loves the movies.  If you haven't seen them, most of them really are pretty good (not that I have seen them ALL).  Belle's absolute favorite is "Barbie in a Mermaid Tale."  She is nuts over mermaids, especially Merliah Summers.  Check out the Barbie Gallery and scroll down to number 21 to see a movie pose.  Here is Merliah's mermaid do.

First, to achieve the beachy waves, I used the blow dryer after her bath (the night before) until her hair was just a little damp.  Then I made three hawser twists with all her hair (no parts, just grab three random sections of hair).  Twist all the way down and wrap the hairband around the ends to keep them tucked in.  One hairband can cover an inch and a half of length if you leave gaps.  It's not nice an neat how you do it during the day, but doesn't matter.  Does that make sense?  I didn't get pictures since I just wanted to get the little people to bed.  By morning, the hair is all dry.  Undo the twists and comb through the hair.  You can skip this step if you don't need to add the texture.

Start the style by  making a piggy out of the top section of hair like so:
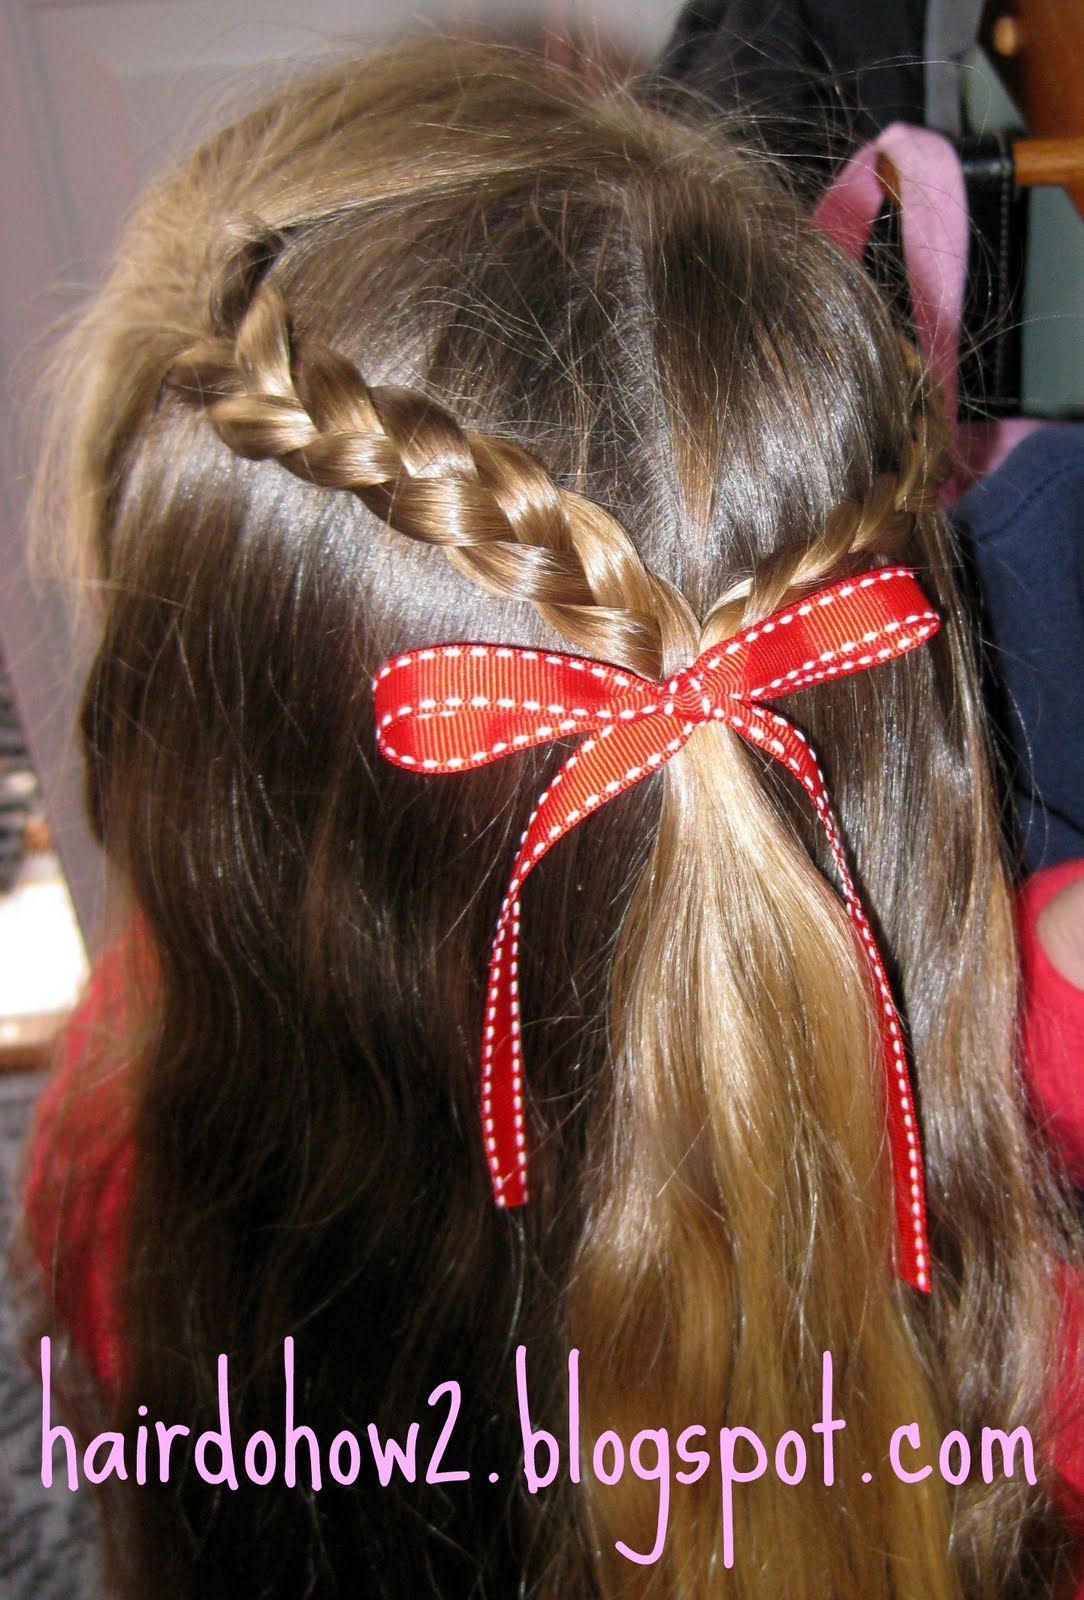
Next, part out the side sections above the ears, brush upward as if to join it into the piggy, but cross them over like how you start to tie your shoe.
Pull it tight to cover the hairband, then clip the tail that is going up toward the forehead to hold it in place.  Tie down the other tail to the piggy.  Clear elastics are best.  It should be hidden, but just in case, you don't want any florescent green sticking out.
Take out the clip, pull the tail tight, and bring it down to cover up the knot and put in another hairband.
To wrap the ponytail, pick up a small section of hair from the back side of the tail.  Wrap it around the front and then around again above the first wrap so it covers the hairband.  Now get your trusty topsy tail tool and tuck the end back in through the hairband at the back.
This style tends to go a little crooked and can show a little of the parts back from the temples, but hey, we can't all be CGI animation, right?  Some of those mermaid hairstyles look impossible, really.  This is a pretty good facsimile, I think.

Thursday, August 11, 2011

Lesson 67: Island Princess Barbie Hairstyle

It's a braid.  Duh, right?  Just put a flower on it.  See Barbie Gallery number 2.  Something new to try, though: Put all the hair in a ponytail, braid the tail, then remove the hairband you put in for the ponytail.  I'm playing around with this idea to work out some new styles.  If  the sides poof out on you, try doing the whole thing wet then letting out the hairband after it dries, or spray it with hairspray.

Tuesday, August 9, 2011

Barbie Gallery

I have written permission from Mattel to use these images here in this post.  All the names of characters and movies are trademarked for Mattel.  I'll be referring to them one at a time (if I ever get to them all) with tutorials.
1.  Mariposa from Fairytopia
2. Ro from Barbie as The Island Princess
 3.  Luciana from The Island Princess
 4.  Kelly
 5. Rosella
 6. Queen Marissa (Rosella's mother)
 7. Liana from Barbie & The Diamond Castle
 8. Musketeer
 9. Another Musketeer
 10. Yet another Musketeer
 11.  Annika from Barbie and the Magic of Pegasus
 12.  Annika
 13. Alexa from Barbie & the Diamond Castle
 14.  Alexa
 15.  Fashion Fairytale
 16.  Fashion Fairytale Fairy
 17.  Stacey
 18.  Merliah Summers from Barbie in a Mermaid Tale
 19. Xylie
 20. Kayla
 21. Merliah
 22. Queen Calissa
 23.  Erika from Barbie as The Princess and the Pauper

Monday, August 8, 2011

Lesson 66: French Braid with Zigzag Part

This one is similar to the dutch one from last week, but different still.

Thursday, August 4, 2011

Getting Ready for Barbie Pics

I have written permission from Mattel to use images of Barbie in my blog.  It's a one shot deal.  One post--that is unless I write another letter and wait weeks for another response.  So I'm going to put several pictures in one post and then give step by step instructions in separate posts over time referring back to the one post for pictures.  So now I want to ask all you Barbie fans (or mothers of fans) which are your favorite Barbie movie hairstyles so I don't miss them.  I will definitely get Merliah Summers from Barbie in a Mermaid Tale and the classic enormous ponytail from several movies, but haven't decided on what else yet.  Leave a comment if you have a request.

(Two posts today--keep scrolling.)

Lesson 65: French Braid in Front

I've been seeing this one everywhere lately.  You don't have to have super long hair, either.  Tie it off where ever your hair ends, or use an X shape with two bobby pins right by the scalp without leaving at tail braid.
Part out the section of the front you want to braid.  I used a bobby pin to hold the back hair out of the way while I braided.
This hairband from Gimme Clips is a flower stuck onto the band.  I like the decoration.  To add a hairband with a bauble on it, position the pretty in place first, then wrap the rest of the band around beneath, being careful not to catch flower petals or whatever in the loops.