Thursday, March 15, 2012

Lesson 98: Simple St. Patrick's Day

Last year for St. Patrick's Day I posted some more challenging styles for making shamrocks and clovers out of hair (see the right side bar).  This year we're keeping it simpler with some less time and skill intensive styles.

First, this little clover looking flower is from Gimme Clips.  (Clover flowers are really purple and white, I know, but we need green to avoid the pinching, right?)  The flower is sewn onto a small hairband.  This was our Daylight Savings Church Day hairstyle (with a blue one that day).  Just make a side part, and then part out a small section from the top of the head to the temple.  Add the hairband, being careful not to get the petals stuck under the hairband twists.
This picture was taken before school one day this week, then I looked out the window and noticed it was windy, so I added some Indian braids (upside down) with the matching hairbands that came with the flowers.
Here's another way to green up a regular hairdo.  Tie some green ribbon into a bow around the end of a bobby pin and insert it into a bun or messy bun.
Keep scrolling down.  I put up two posts today.

Lesson 97: Braided Tails Up

The Lilla Rose website has a simple style called "Tails Up" that is basically a french twist with the tail sticking up, and one of these clips to hold it down.  This is a fancier version of that.

Begin with a side part at the top of the head.  French braid the hair on the larger side to the ear, and then braid it out to the end.  Add a clear elastic.  Gather the rest of the hair at the back, and braid it.
Lift the braid up.
Wrap the other braid around the back of the fatter braid, covering the elastic if you can.
Put in the flexi-clip to hold it down, being sure to pick up hair from the scalp.
Spray the tail with water if you need to to tame it.  Belle's is sticking straight up too high.

Monday, March 5, 2012

Lesson 96: Peacock Bun

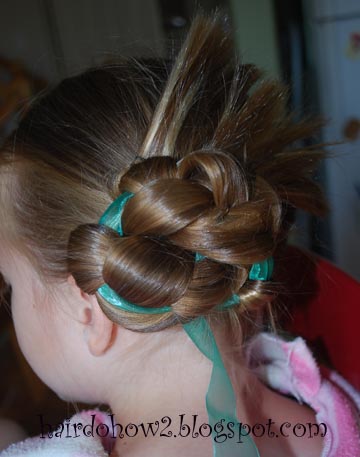
Belle named this one herself.  Begin with a low side ponytail.  Add a ribbon to the top.  Our ribbon is from Gimme Clips from their Gimme Braids line.  It has a loop sewn at the top and comes with a mini bobby pin.  If you don't have one, you can tuck the end of a regular ribbon into the hairband, maybe tying it if you think it will come loose.
Braid the hair, being careful to keep the ribbon showing at the outside.  Fasten it off with a clear elastic.
Wrap the braid around to form a bun.  Leave the tail sticking up to make the "peacock feathers."  Insert bobby pins to hold the bun in place.  If you push in a pin and it won't go because the ribbon is in the way, pull it back out, and try a new place.
Tuck the ribbon in to hide it or wrap it around the whole bun.

Saturday, March 3, 2012

Giveaway Winner

The roll of the dice goes to number four: Becky!  Congratulations!

Friday, February 24, 2012

Bow Giveaway

This is our first giveaway here at Hairdo How-to.  It's always fun to see it on other websites, so I wanted to try it here.  In my small effort to spread goodwill to all the world, the winner of this drawing will receive these three hair bow clips that I made myself.
Here is how to enter:
Mandatory entry #1:
Do a service for someone else, like a random act of kindness.  Big or small, this service must be something out of your ordinary routine and not expected of you.  Leave a comment at the end of this post.  You may choose to tell what your service was or not.

Optional entry #2:
Read The Mansion by Henry Van Dyke and leave a comment with your short review of the book.  If you don't have it and can't find it at the library, do an online search where you can read it on the internet. 

Optional entry #3:
Share this contest with your Facebook friends or Pinterest or whatever your social media of choice is, or share it with your real friends.  Leave a comment.

Deadline for entries will be Friday, March 2 at 11:59 PM Mountain Daylight Time.  Belle will help me choose a random number (we'll draw from a hat or something since I don't want to spend the time to learn how to do it electronically) and announce the winner on Saturday, March 3.  The winner will then have 48 hours to respond with their contact information, or I will have to redraw.  Have fun!

Thursday, February 23, 2012

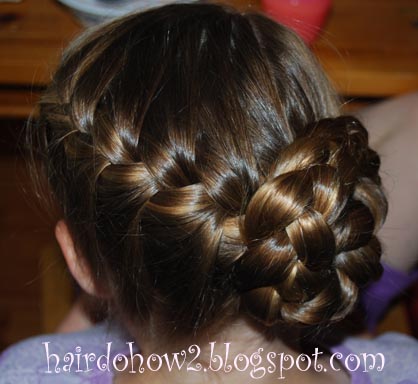
Lesson 95: Rounded French Braid with Side Braid Bun

I absolutely love this hairstyle.  It is so gorgeous!  It is pretty enough for a special occasion, I think.  These pictures are from Belle's long hair days.

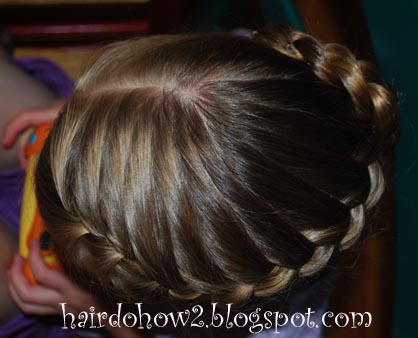
Part the hair at the top on the side.  French braid the hair down the middle of one side (the side with more hair), but when you get back to the top of the head, begin gathering up triangular sections of hair (use a comb), all with the same point at the end of the part.
Braid around the back of the head to above the ear.  Add in the remaining hair from the front. Fasten it all off with a hairband if you want to, but it isn't necessary.  Braid the tail, fasten the end with a clear elastic, and wrap the braid into a bun.  Hide the ends underneath, and secure it all with bobby pins.
There is a drawback to this style.  There will be a lot of different lengths of hair ending in different places in the braid.  It may be difficult to keep short strands from popping out of the braid.  Also, the little ends poking out can make this hairstyle very itchy.  Belle couldn't stand to leave it in very long.  I've been trying to imagine something like a doughnut shape piece of fabric or something to protect the scalp from itchy hair, but I don't know if the pins would stay then.  Let me know if you have the same trouble and if you have any solution ideas.  Please leave a comment.
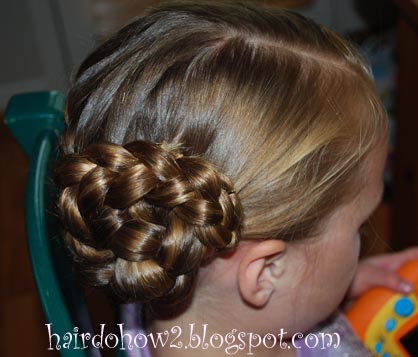
Now that Belle's hair is short, we can't do this, of course.  Here is the closest facsimile I can create:
I used larger sections for the braid since was I was hurrying before school, and just made a side pony instead of a bun.  This was Read-a-thon day, so I put in this fabric flower with words all over it.  It is from Gimme Clips.

Thursday, February 16, 2012

Lesson 94: Wide and Flat Dutch Braid with Messy Bun

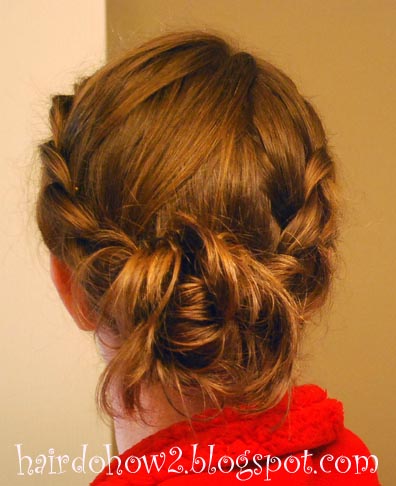
"Boho-chic" or "hobo-chic" is a style that has been coming and going for a while now, meaning basically looking like a stylish mess.  (It comes from Bohemian gypsies, hippies, and homeless).  I think I pulled it off here...  I tried it out on myself one day and then on Belle the next so I could get step by step pictures.
Start by parting the hair on top, side or middle, but not all the way back.  Dutch braid both sides.  When you take hair from the middle of the head, gather a triangle shape piece with the top of the point at the crown of the head rather than a horizontal rectangular piece.  It shows how better on Belle's photo than mine since I couldn't really see what I was doing when I braided my own hair.  Hold the ends with clips or loose hairbands.
To make the braid look wide and flat, pull on the outside edge of each plait one at a time.  You can start from the top or bottom, going back again to readjust any that get tightened up again.
Fasten the braids together at the base of the head, and then make a messy bun.
This was a school day, so I used tiny jaw clips to hold the messy bun in place as well as bobby pins.  Then I covered it up with this flower thingy I made for her Halloween costume to hide some of the clips.